Using Alchemist
Alchemist will launch into a setup screen on first launch, and then a home screen on future launches. Information in the setup screen is not shared, it is only used for quick connections.
Tip
In generl, if not everything is visible on screen, Alchemist will render scrollbars.
Home Screen
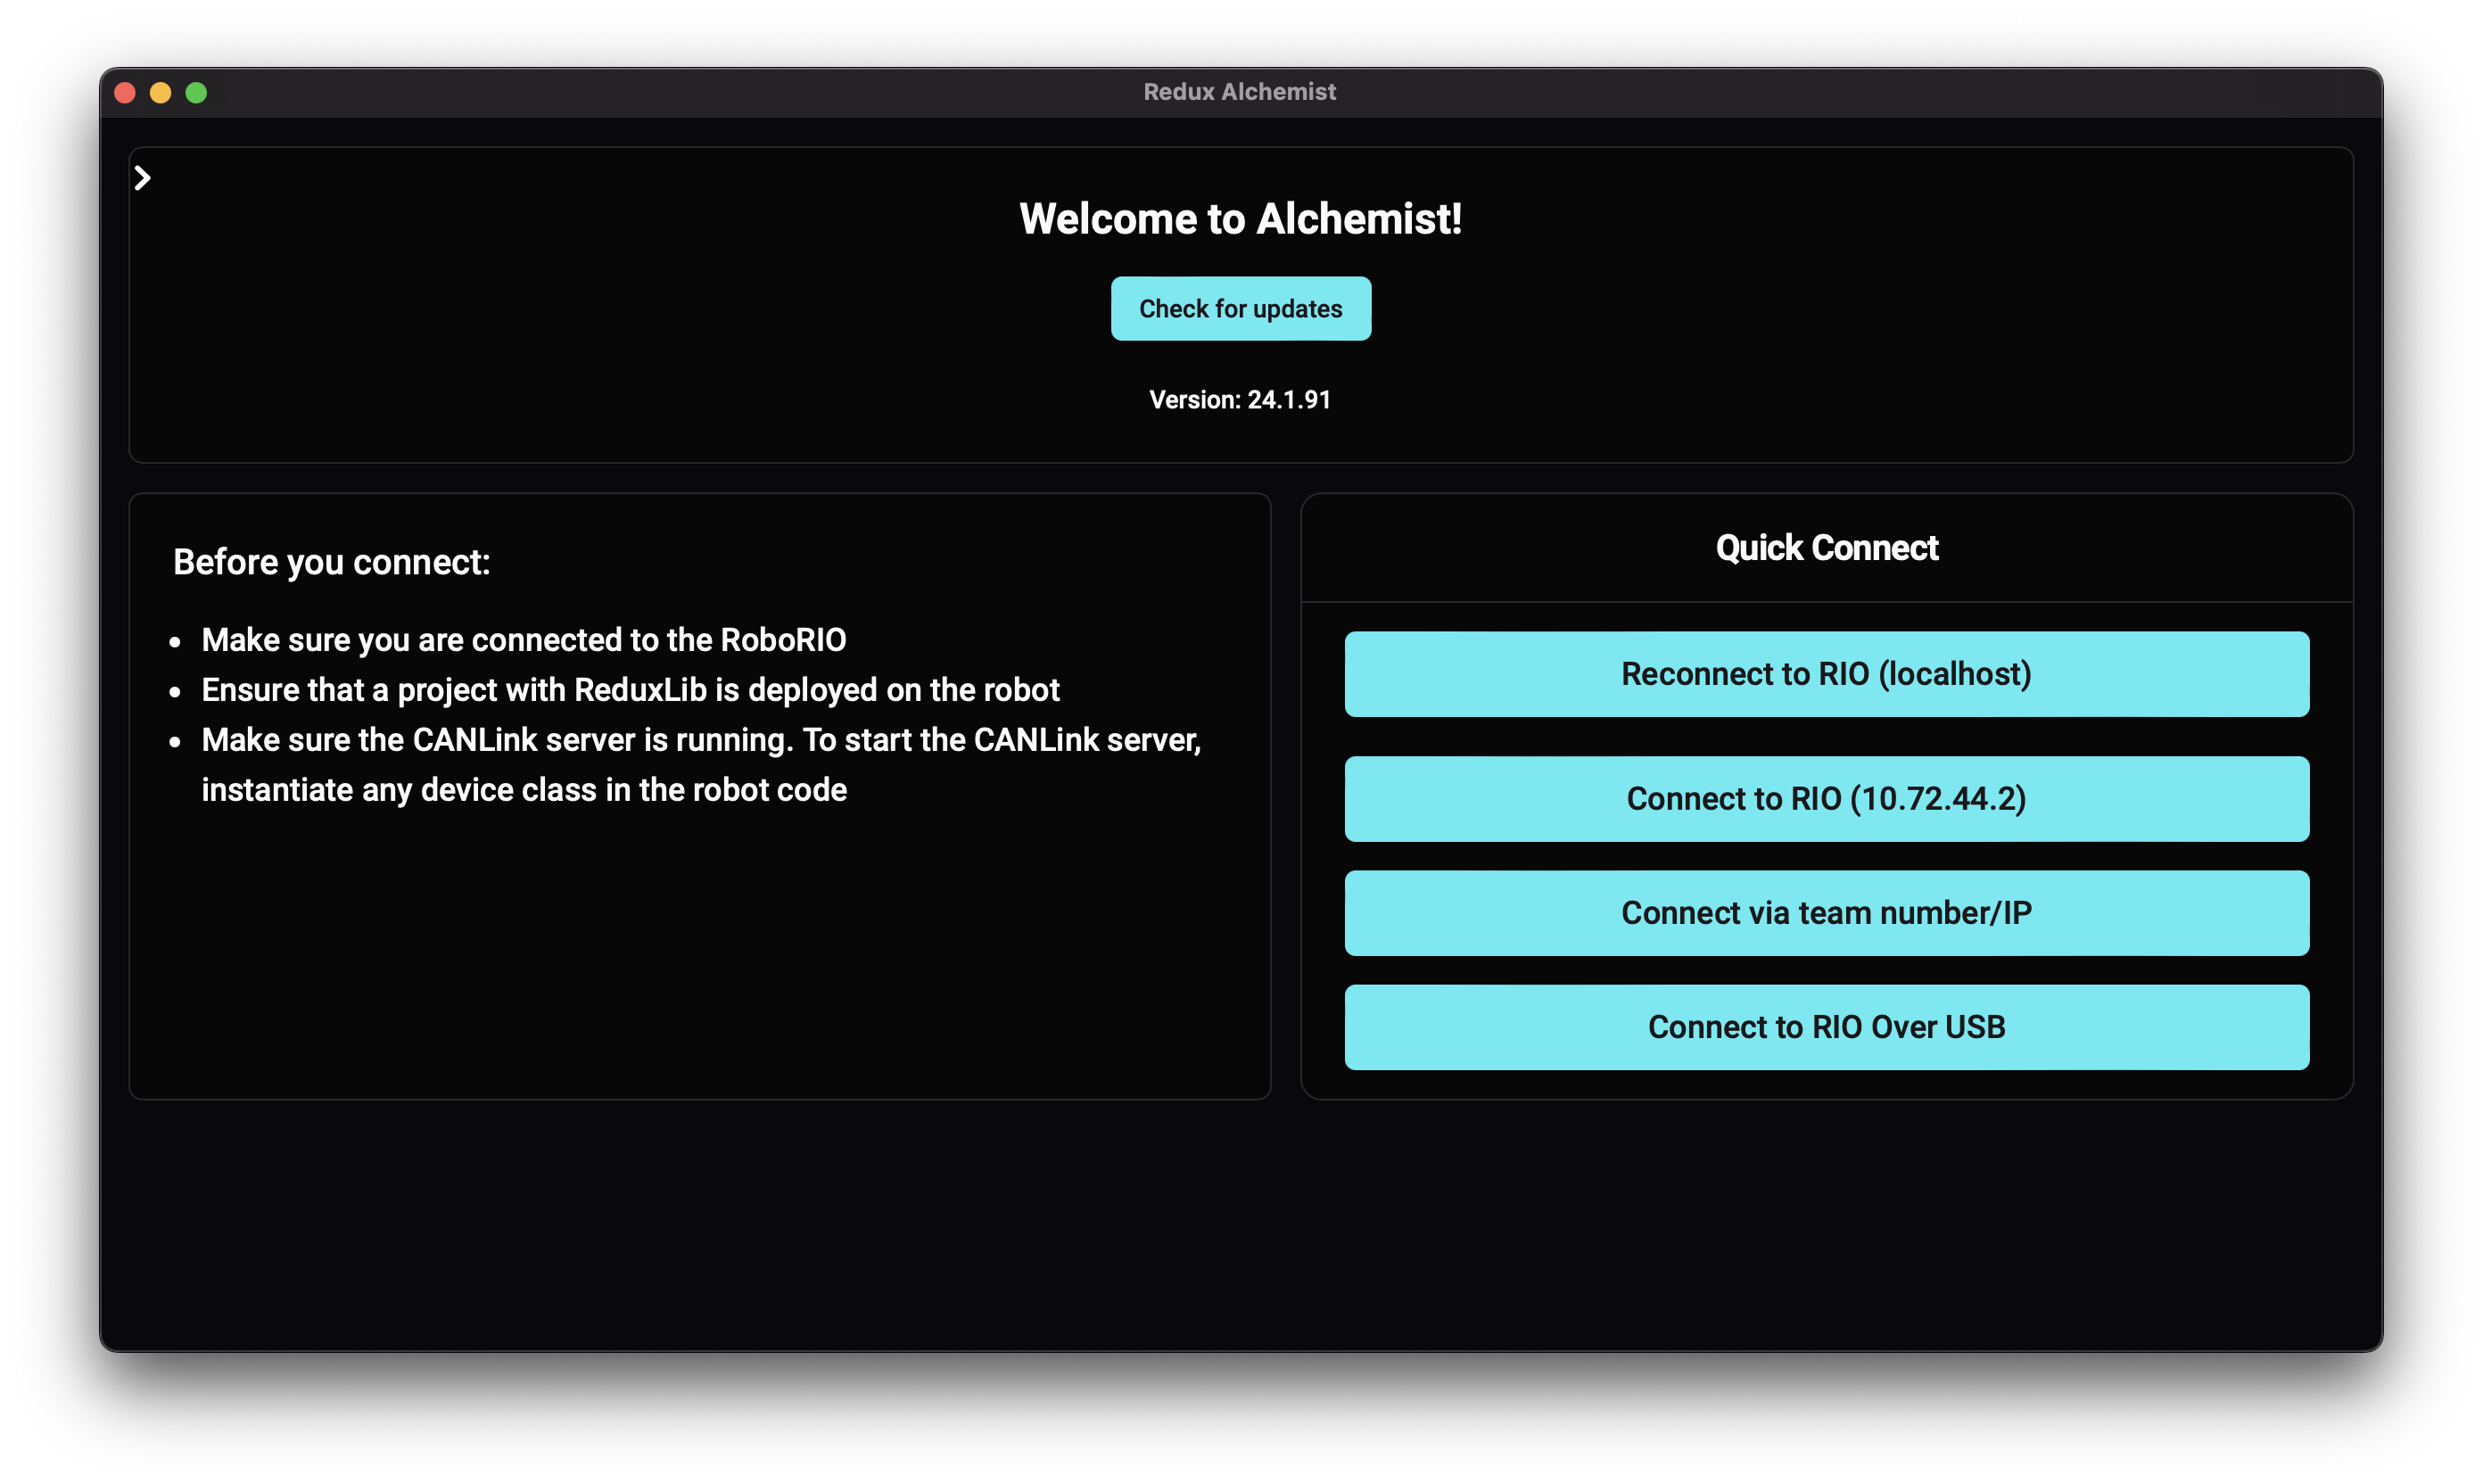
This tab will allow you to quickly connect to your robot, check for updates, and navigate to devices once connected.
Connecting to a robot
In the home screen, enter either the appropriate team number or hostname under Enter IP Address or Team Number
(such as 9999 or roboRIO-9999-FRC.local) and click Connect to CANBus!.
Note
If you entered your team number during setup, Quick Connect will automatically enter the correct IP for you
Alternatively, you can connect to a RIO Over USB, reconnect to the last successfully connected IP, or use the Quick Connect
The UI should display Connected! on success, and devices should now be visible in the Device Pane. If there are issues connecting or detecting devices:
Try pressing Disconnect and reconnecting with Connect to CANBus
Ensure the Rio is accessible by navigating to the IP/hostname in a web browser, which should bring up NI’s network configuration pages
Ensure that the CANLink server is running by redeploying your robot project with ReduxLib (see Setting Up the Redux CANLink Server)
Check that the Redux CAN devices are connected, and try power cycling them.
If all else fails, try selecting restarting Alchemist.
The Device View
This tab configures individual Redux devices.

Tip
If you ever need to go back to the home screen, click the arrow in the top left to open a navigation drawer.
Device identification
All Redux CAN devices have a multi-color LED. Toggling the Blink LED! button on the top of a device page will strobe that device’s LED until toggled off.
Editing device settings
The settings tab has device specific settings (such as frame periods or filter widths) that can be edited.
The save button will save changes to the device, and the cancel button will revert all changes. Additionally, devices may be Factory Reset
For more information on how to configure devices, see the individual device pages.
Tip
If you are unsure what a setting does, hover over it to see a tooltip!
Firmware updates
The Upload Firmware button will open a window allowing you to update devices and download new firmware. Pressing fetch new updates will download updates from the internet, and pressing install downloaded firmware will automatically download the firmware to the device.